Intelligent Mask – Augmented Reality
Track and animate a user’s facial expression in real-time using ARKit, use emotion detection model to detect his or her emotion using Vision framework, and apply the result to switch to one of the animal masks that adapts to this emotion.
Introduction
The current augmented reality apps mainly focus on overlapping virtual objects onto physical world. The raw data like face and world tracking is directly used as the input of such pipeline. It might be interesting that we can preprocess the data with machine learning and use their result to influence the augmented effect.
In this project, my main point is to fuse the AR and AI part within Apple’s developing environment. It is divided into two parts: face tracking and emotion prediction with Vision framework. A pretrained model will be used and converted into CoreML model that Vision framework can use. The source code can be found here.
Face Tracking
ARKit is a framework that handles the processes of creating augmented reality experience including world tracking and establishing a correspondence between the real-world space and the virtual space. In other words, it should coordinate with another virtual content framework like RealityKit, SceneKit or MetalKit. In this project, I use SceneKit and Storyboard as UI template.
ARKit Configuration
ViewController.swift will handle most of the work including arkit session and scenekit management. To enable face tracking feature, some configuration option should be activated. Of course we should check if the feature is supported firstly. ARKit is a session-based framework. The session inside the code is the arkit session instance inside SceneKit object sceneView.
guard ARFaceTrackingConfiguration.isSupported else {
            print(" Face Tracking Not Supported ! ")
            return
}
let config = ARFaceTrackingConfiguration()
config.isLightEstimationEnabled = true
config.providesAudioData = false
sceneView.session.run(config, options: [.resetTracking, .removeExistingAnchors])
View Management
We can use some pre-defined functions to manage view in SceneKit, such as viewDidLoad and viewWillDisappear. All the initialization tasks can be placed inside viewDidLoad function. At this stage, we can initialize a scene object and assign to local property.
let scene = SCNScene()
sceneView.scene = scene
ARFaceAnchor to SCNNode
Like in Unity that every object is a GameObject, in SceneKit every object is a node. ARKit will create an ARFaceAnchor object that specifying the transform of detected face. The task here is to register it in local property whenever a face anchor is found. A pre-defined delegate function called renderer can be use here.
// local property
var anchorNode: SCNNode?

// this func get called for each anchor added to the scene
// pass in as value of anchorNode property
func renderer(_ renderer: SCNSceneRenderer, didAdd node: SCNNode, for anchor: ARAnchor) {
    anchorNode = node
}
Mask Geometry Creation
A low-poly mask can be easily made inside Xcode Editor by following the tutorial in the book ARKit by Tutorials, on chapter 16. The main task is to make the components of face as child node inside a parent node. This structure will be useful to animate face later.
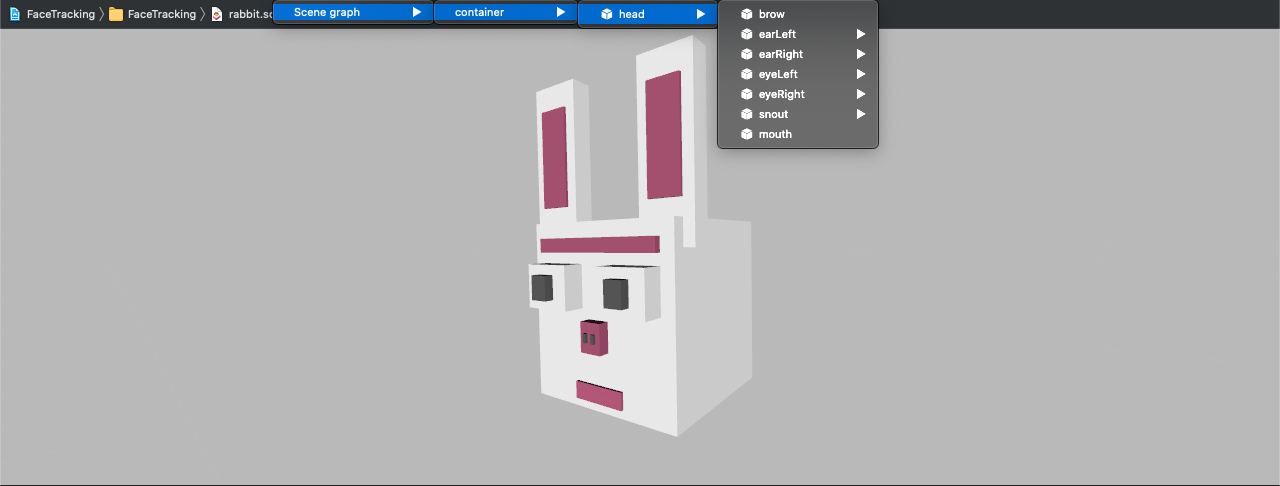
We will define an Animal class to handle geometry creation task. An SCNNode representing the mask will be initialized in the constructor. At this step, the init function will ask a name for this animal so that it will retrieve the correponding one.
let occlusionNode:SCNNode

init(geometry: ARSCNFaceGeometry, animalName: String) {
    geometry.firstMaterial!.colorBufferWriteMask = []
    occlusionNode = SCNNode(geometry: geometry)
    occlusionNode.renderingOrder = -1

    super.init()
    self.geometry = geometry

    guard let url = Bundle.main.url(forResource: animalName,
                                    withExtension: "scn")
    else{
        fatalError("Missing resource ! ")
    }

    let node = SCNReferenceNode(url: url)!
    node.load()

    addChildNode(node)
Back in ViewController.swift, we can define a function that creates the face geometry and mask object as below.
func createFaceGeometry()
{
    print(" Creating face geometry. ")
    let device = sceneView.device!
    let animalGeometry = ARSCNFaceGeometry(device: device)!
    rabbit = Animal(geometry: animalGeometry, animalName:  "rabbit")
}
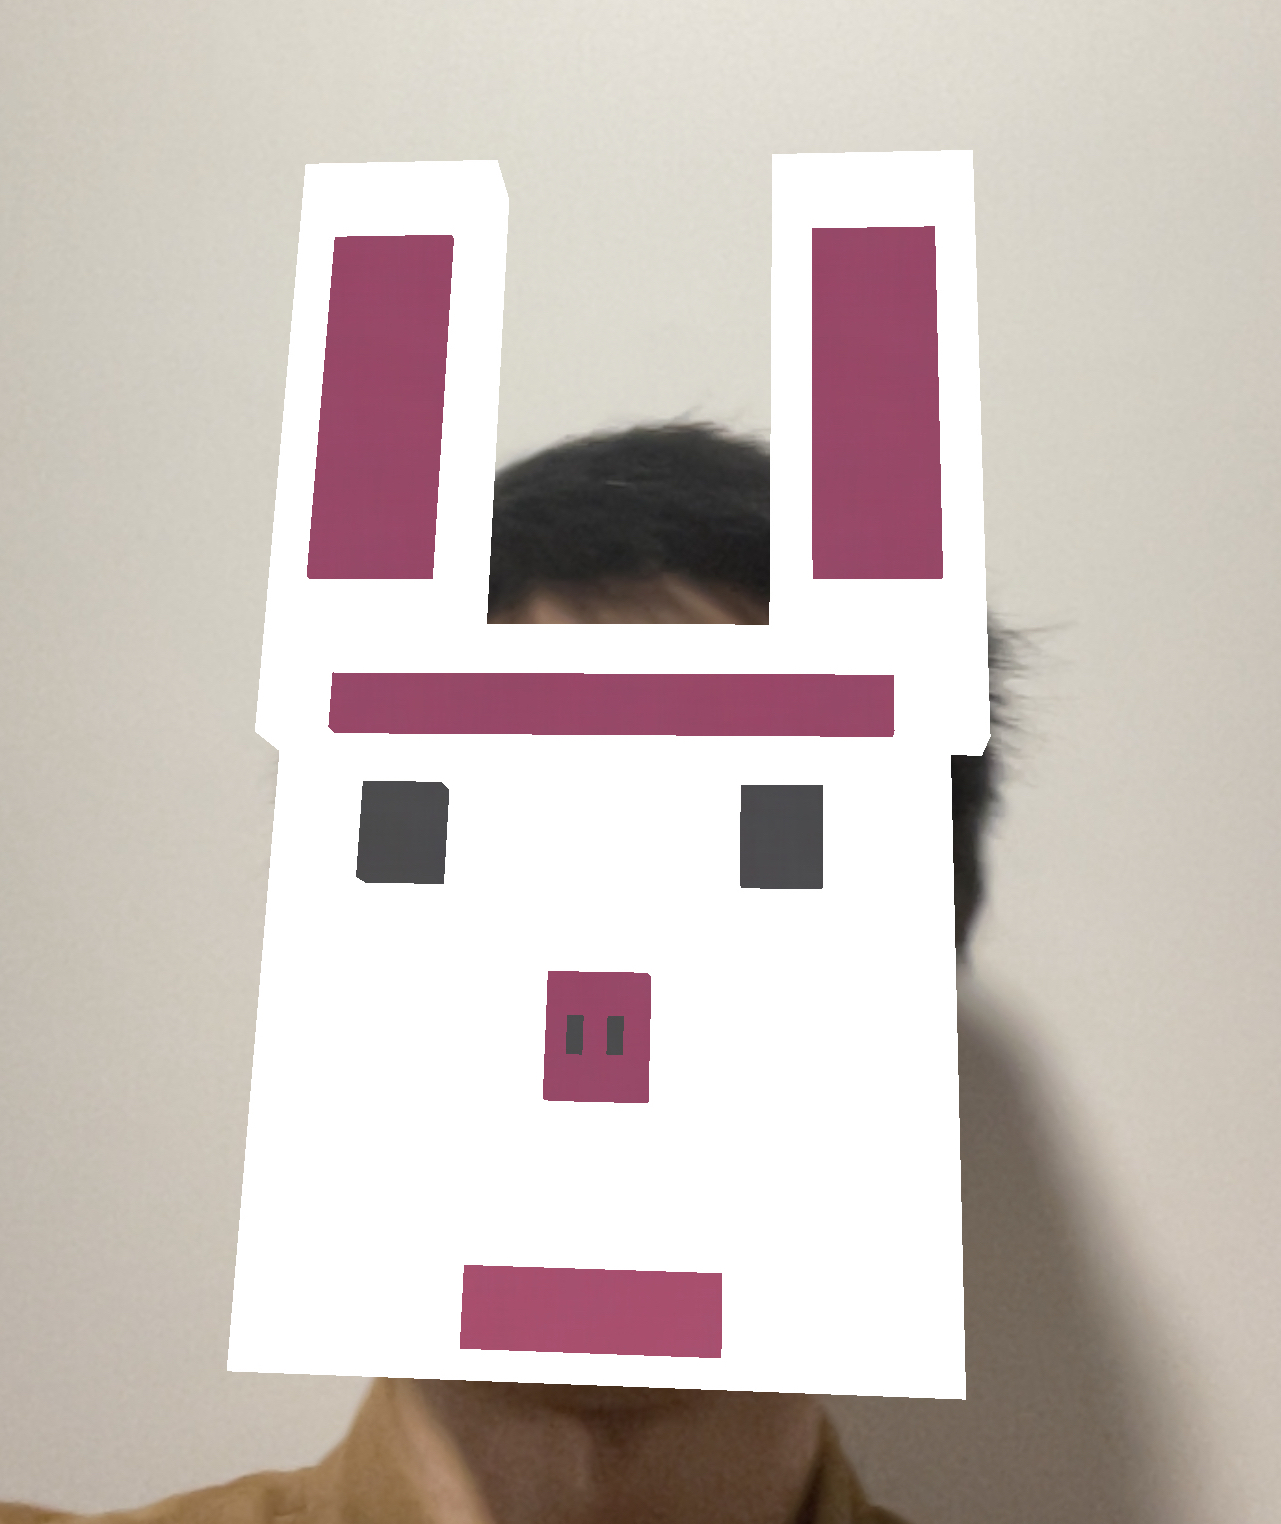
Normally at this stage, the face can be detected successfully.
Blend Shapes
For now, the components of virtual mask will not move. We wish that we can animate the virtual components like that of our actual parts. For example, if we open the mouth, the corresponding part will become bigger. To do so, we need to use Blend Shapes feature. This feature describes the change of components like the eye blinking. What we need is to convert these data as the change onto virtual geometry. The code below is an example for mouth.
    private var neutralMouthY: Float = 0
    private lazy var mouthNode = childNode(withName: "mouth", recursively: true)!
    private lazy var mouthHeight: Float = {
        let (min,max) = mouthNode.boundingBox
        return max.y - min.y
    }()

    init(geometry: ARSCNFaceGeometry, animalName: String) {
        neutralMouthY = mouthNode.position.y
    }

    func update(withFaceAnchor anchor: ARFaceAnchor) {
        blendShapes = anchor.blendShapes
    }

    var blendShapes: [ARFaceAnchor.BlendShapeLocation: Any] = [:] {
        didSet {
            guard let mouthOpen = blendShapes[.jawOpen] as? Float else {return}
            mouthNode.position.y = neutralMouthY - mouthHeight * mouthOpen
            mouthNode.scale.x = 1 + mouthOpen
            mouthNode.scale.y = 1 + mouthOpen
        }
    }
}
Machine Learning Model Conversion
The facial expression detection is a classical machine learning challenge. The main job is to accept an image as input, preprocess it as a 48*48 pixel grayscale image and classify it as one of the seven emotions.
This app will not create and train a model from zero. Instead, it will use a pre-trained one and integrate it into iOS development environment. In order to do so, we need firstly coremltools which is a python package that can convert third-party model into .mlmodel file. With this file, we will use Core ML to integrate it into the app. Core ML is Apple’s native Machine Learning framework that use request object to handle input and observations to include the output.